
Add a child to a family
Add a child to an existing family, with date of birth, allergies, medical conditions, and a room.
Once a family exists, add each of their children from the family's card.
Add the child
- Go to Families & Children → Families and find the family.
- In the family card's Children section, click Add child.
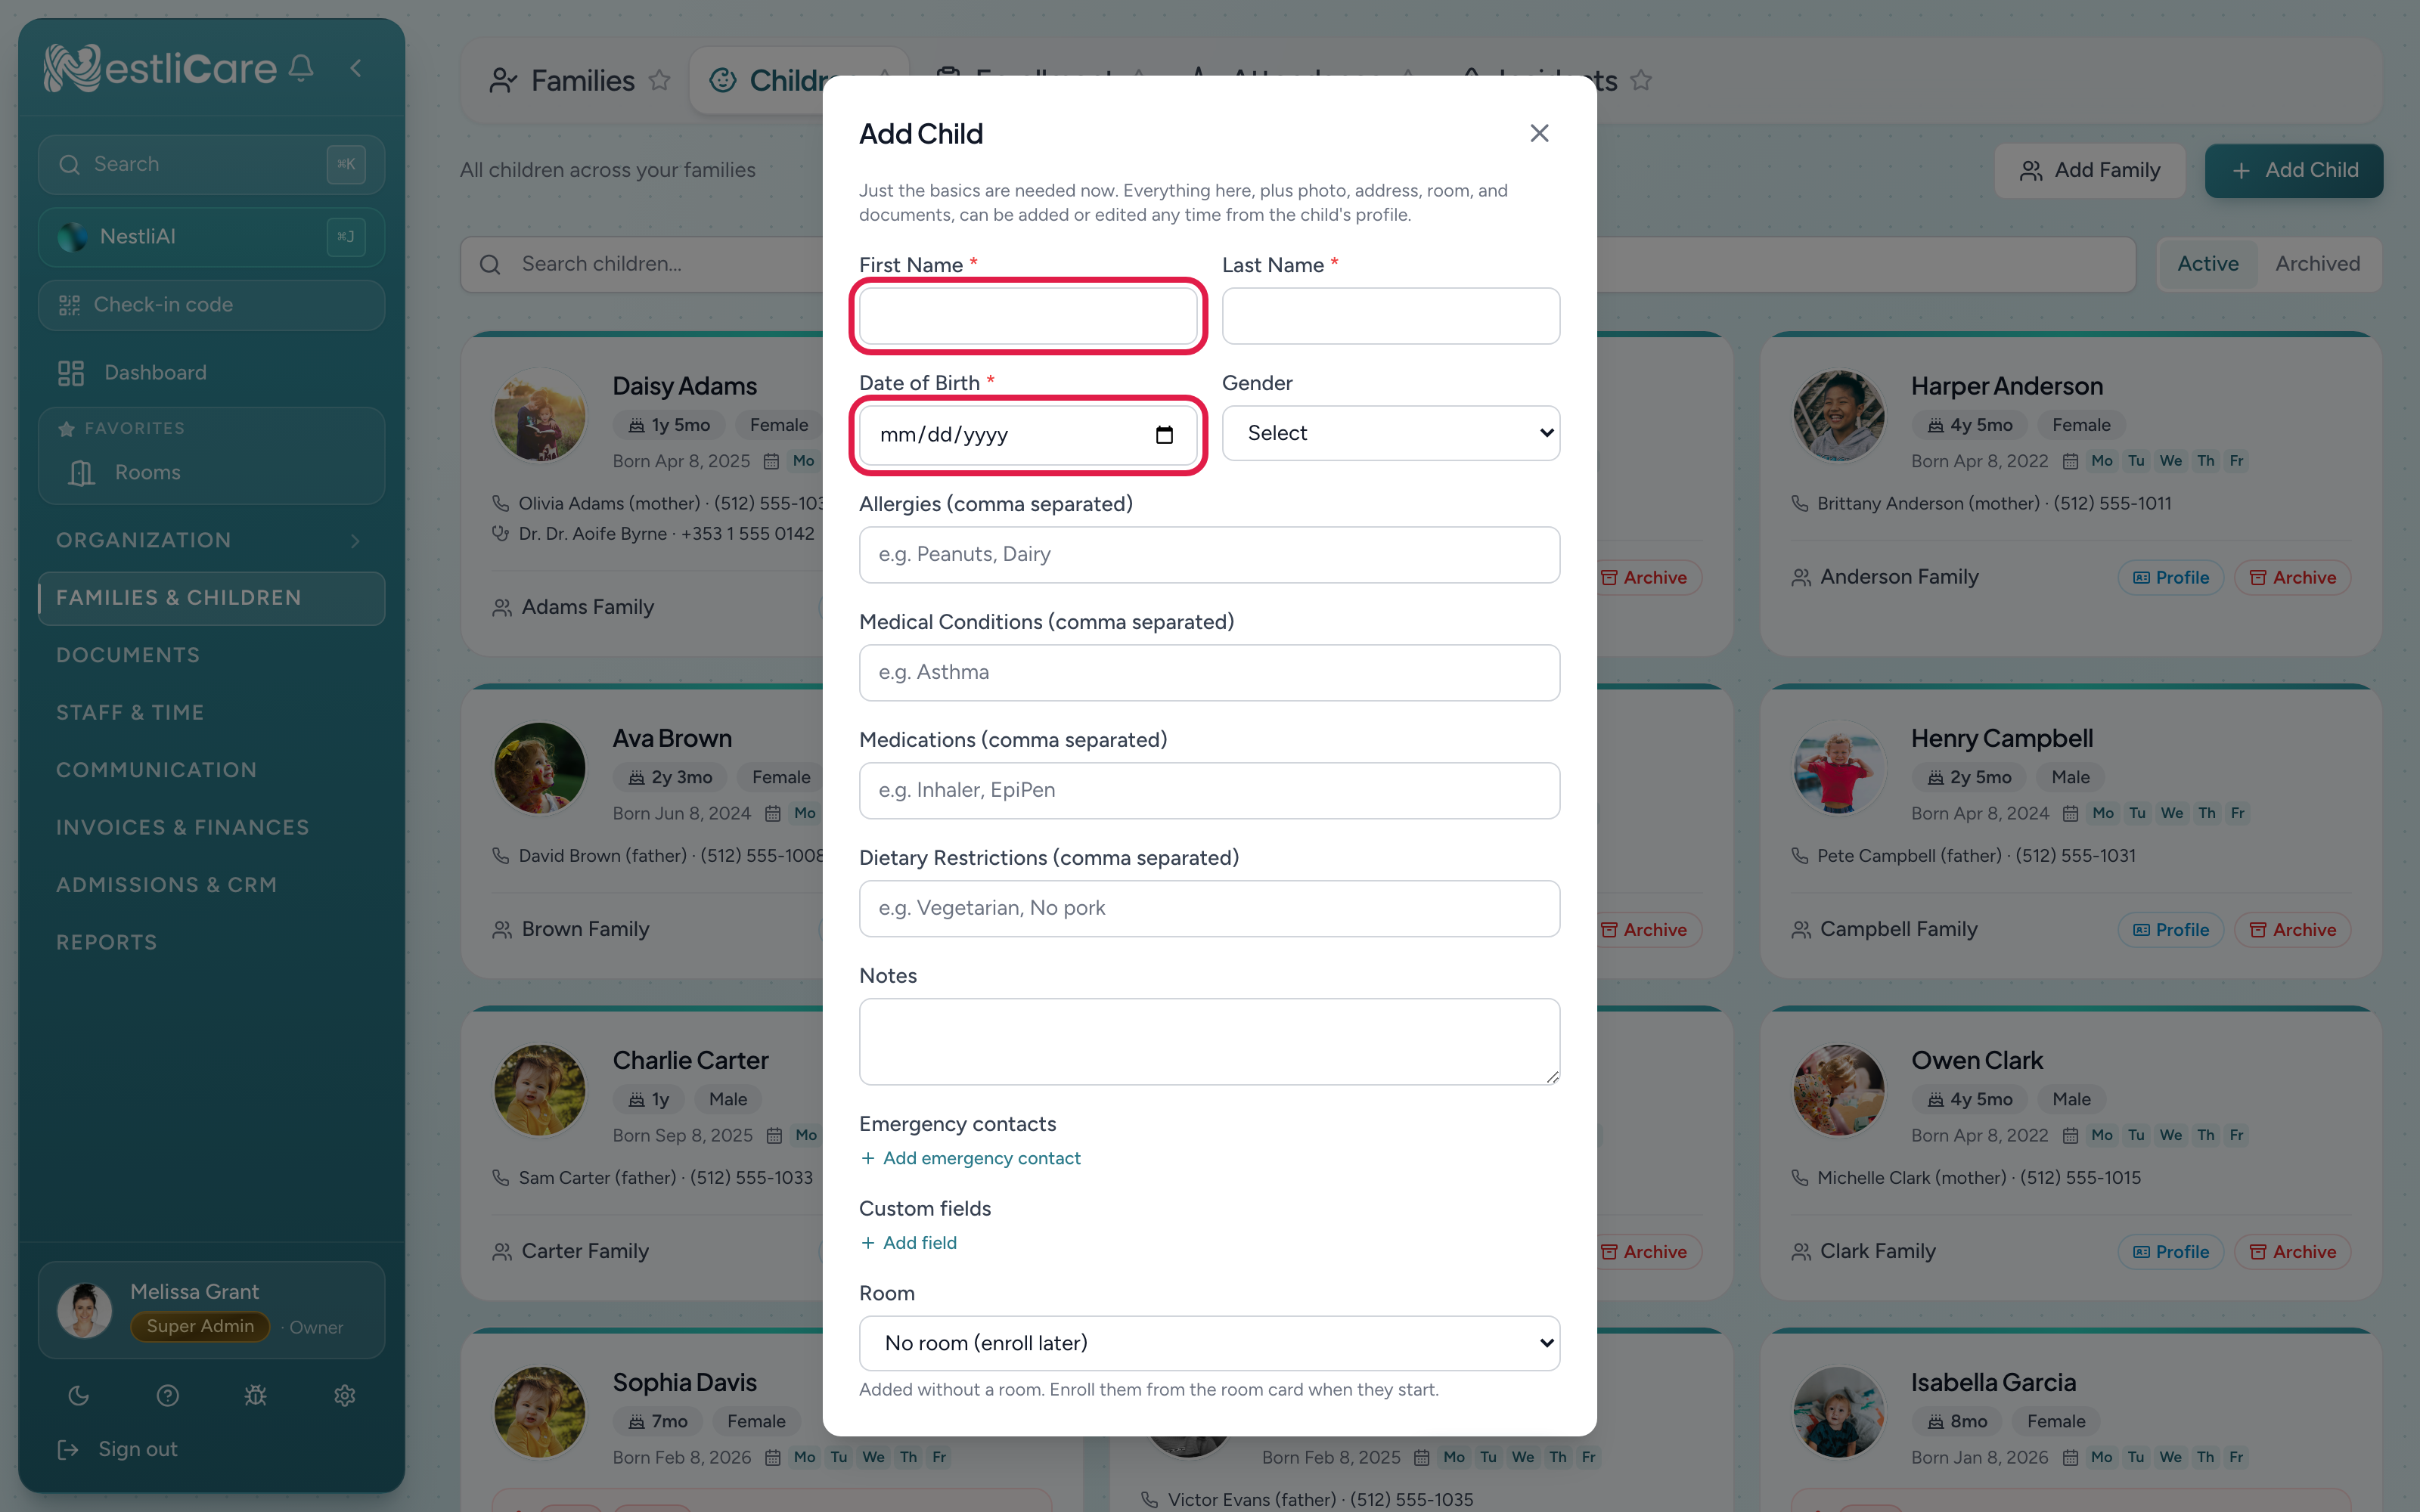
- Fill in the Add Child form:
- First Name and Last Name (required)
- Date of Birth (required). This drives age-group logic and age-up reminders.
- Gender (optional)
- Allergies (optional), comma separated, like
Peanuts, Dairy - Medical Conditions (optional), comma separated, like
Asthma - Notes (optional) for anything else
- Room: place them in a room now, or choose No room (enroll later).
- Click Add Child.
The child appears under the family right away.
About the room and enrollment
The Room dropdown on this form places the child in a room. The start date, enrollment type, tuition plan, and the days they attend are set afterward from the child's profile: open it and use the Enrollment section on the Details tab. (A room card's Enroll child collects the same things up front.) See Move a child from one room to another for how enrollment works.
If you chose No room (enroll later), the child exists but isn't on any roster yet. Enroll them from their profile's Enrollment section (or a room card) whenever you're ready.
Siblings
Add each child separately. They all share one family record (parents, billing, primary contact), but each child has their own room, activities, and attendance.
Troubleshooting
"Date of Birth can't be in the future." Enter a real date of birth. For a not-yet-born child, wait until they arrive or use the expected date and update it later.
I don't see an Add child button. Make sure you're on the family's card in Families & Children → Families. The button is in that card's Children section.
I added the child to the wrong family. Remove the child and re-add them under the correct family. There's no direct move-between-families control in the web dashboard.