
Move a child from one room to another
How to move a child between rooms in NestliCare. Click Change on the Room row of their profile, or re-enroll them fresh if the move comes with a new start date.
This page is about changing the room a child is enrolled in for good. The quick way is one click on their profile; there's also a two-step re-enroll for when the move comes with a fresh start date or a new tuition plan.
The quick way: Change on the Room row
- Open the child's profile. You can get there from Families & Children (click the child), from their family's card, or from their row on a room card.
- On the Details tab, find the Enrollment section.
- Click the Room row (every row in the Enrollment section opens its own editor), and pick the new room.
That's it. The move takes effect going forward: the new room's roster, feed, and check-ins pick the child up, and everything else stays put — billing plan, weekly schedule, start date, family, history, and invoices are all untouched.
The same Enrollment section also holds the start date, planned end date, enrollment type, weekly schedule, and billing plan — handy when the move and a schedule or plan change happen together.
The fresh-start way: remove, then re-enroll
Sometimes a move should look like a new chapter: an age-up into preschool with a new start date and a new rate, for example. In that case, end the old enrollment and create a new one so each room's dates and plan are recorded separately.
Step 1: Remove them from the current room
- Go to Organization → Rooms.
- Find the room the child is in now. Each room is a card with an Enrolled Children list.
- Hover over the child's row. Two buttons appear on the right: an ID card (Child profile) and a red person icon (Remove from [room name]).
- Click the red Remove from [room name] button.
- In the confirmation, click Remove.
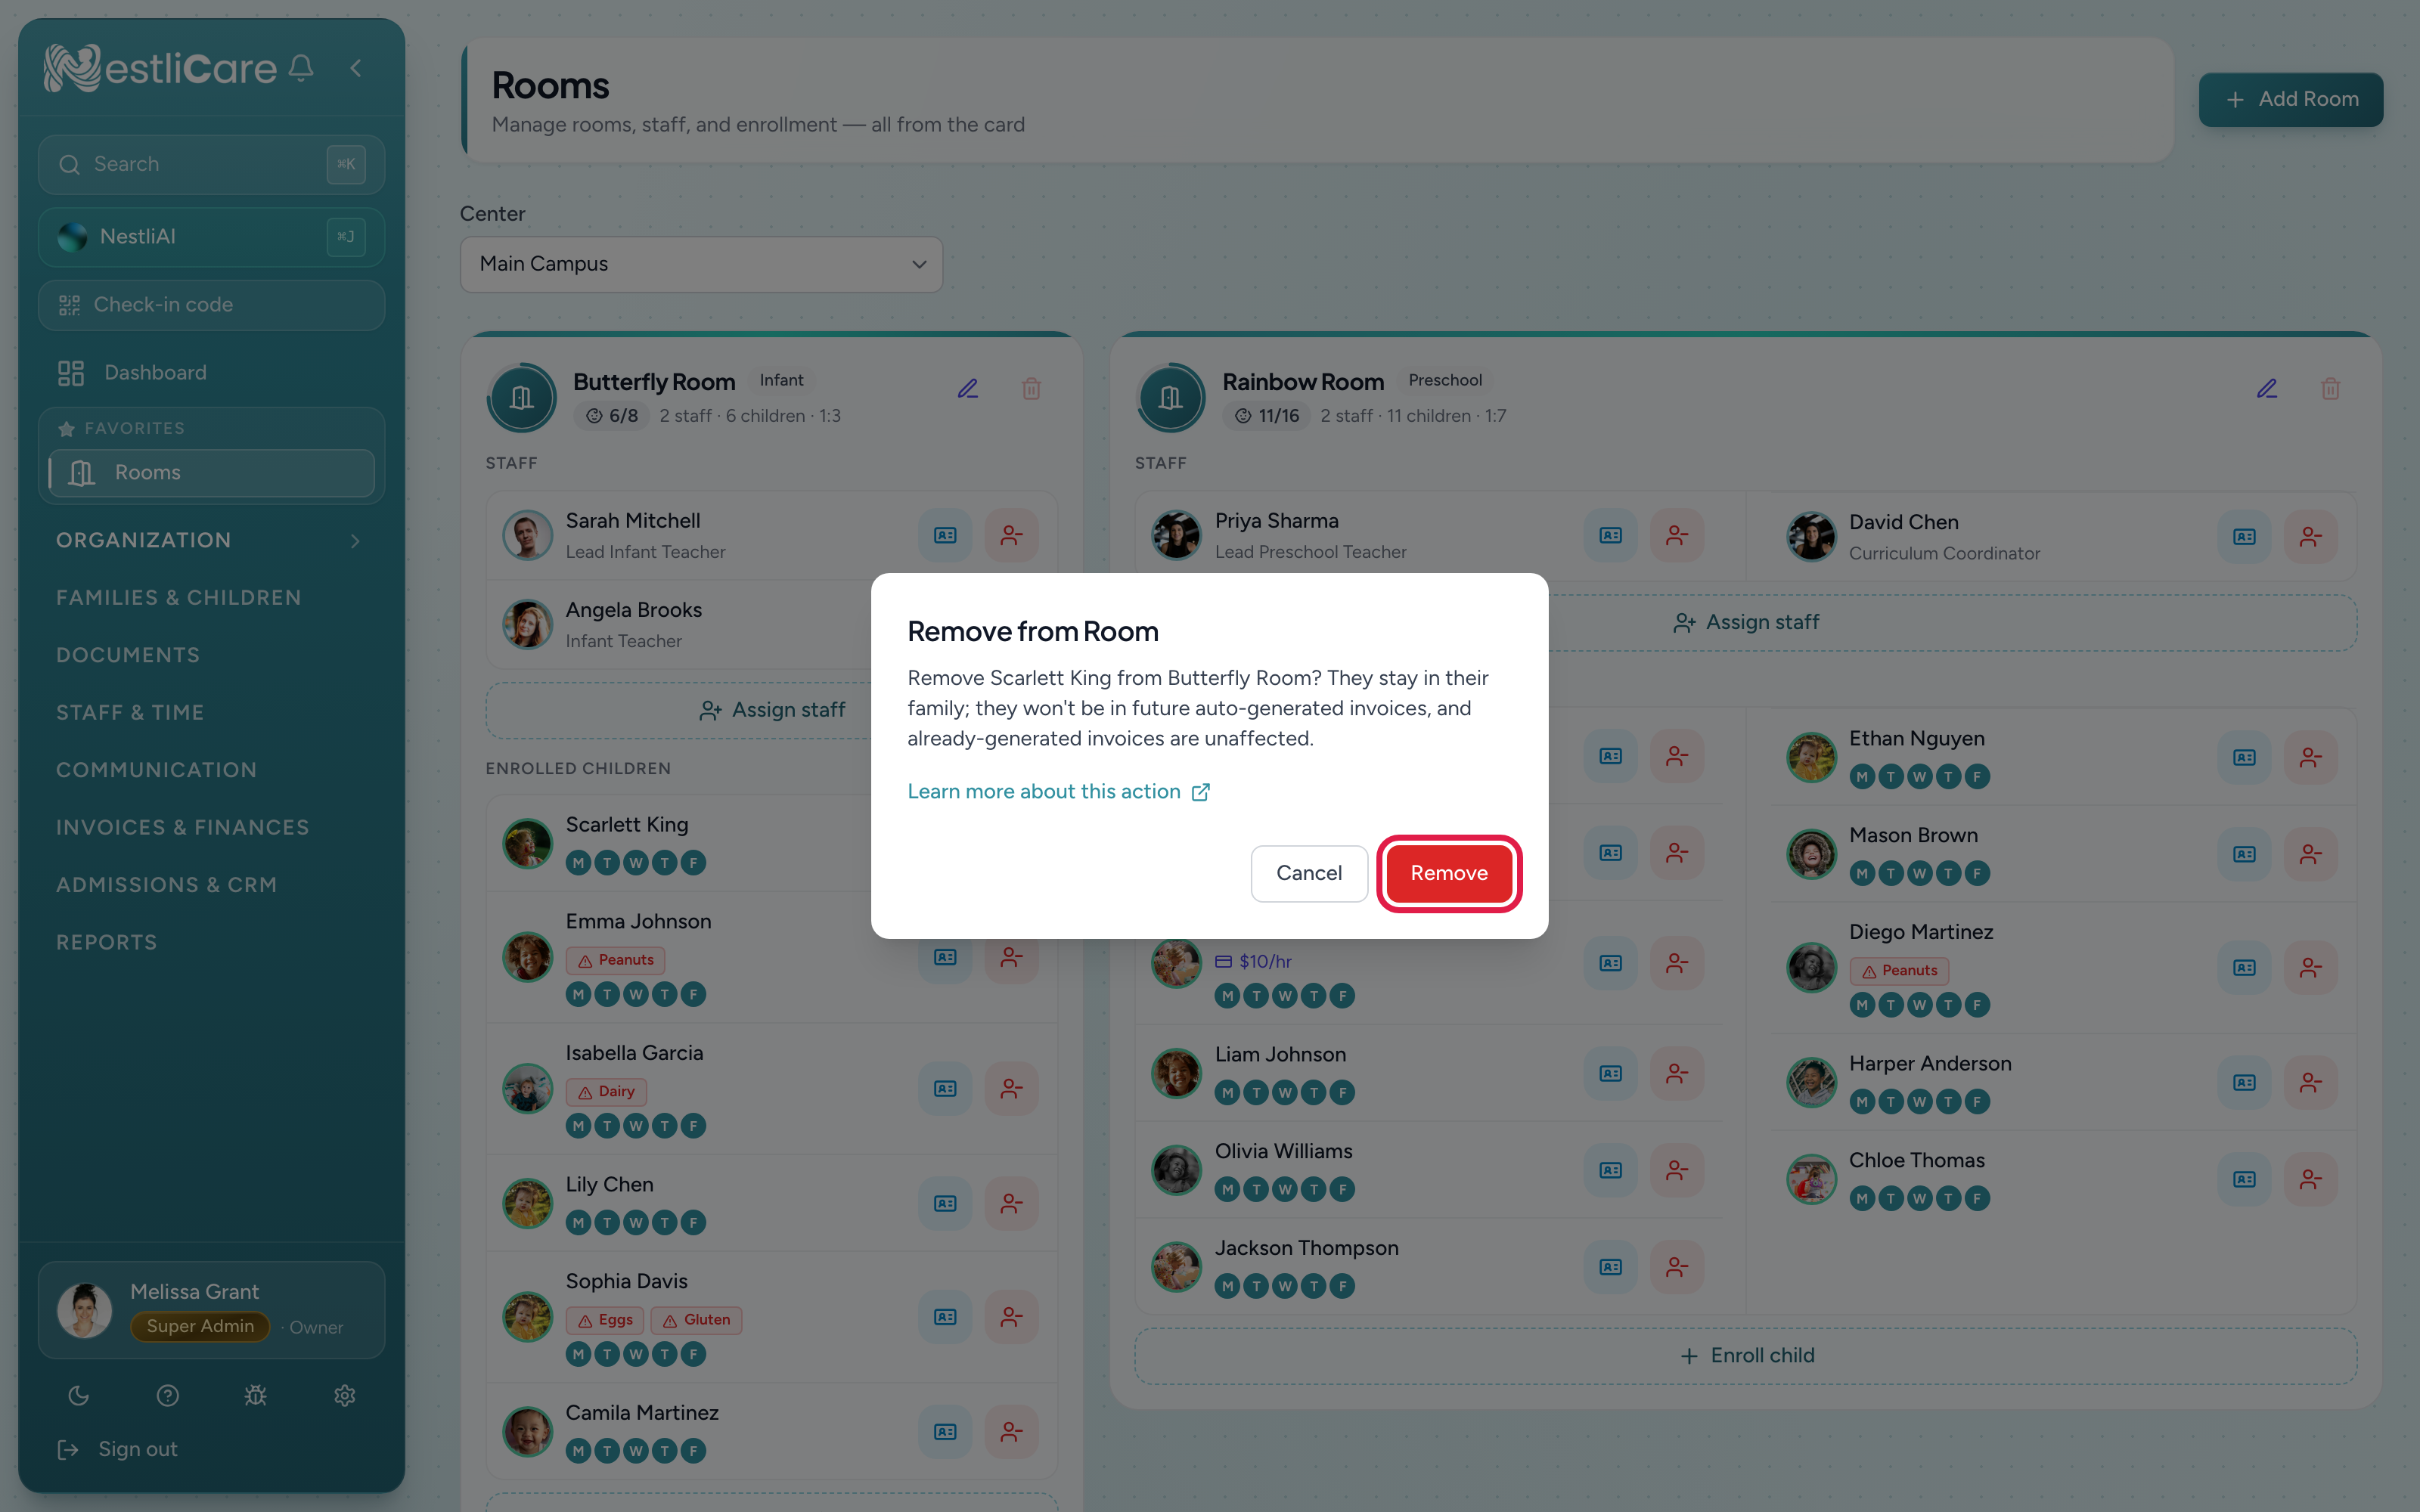
Removing a child does not delete them. It ends their enrollment in that one room. They remain in their family, and any invoices already generated are unaffected.
Step 2: Enroll them in the new room
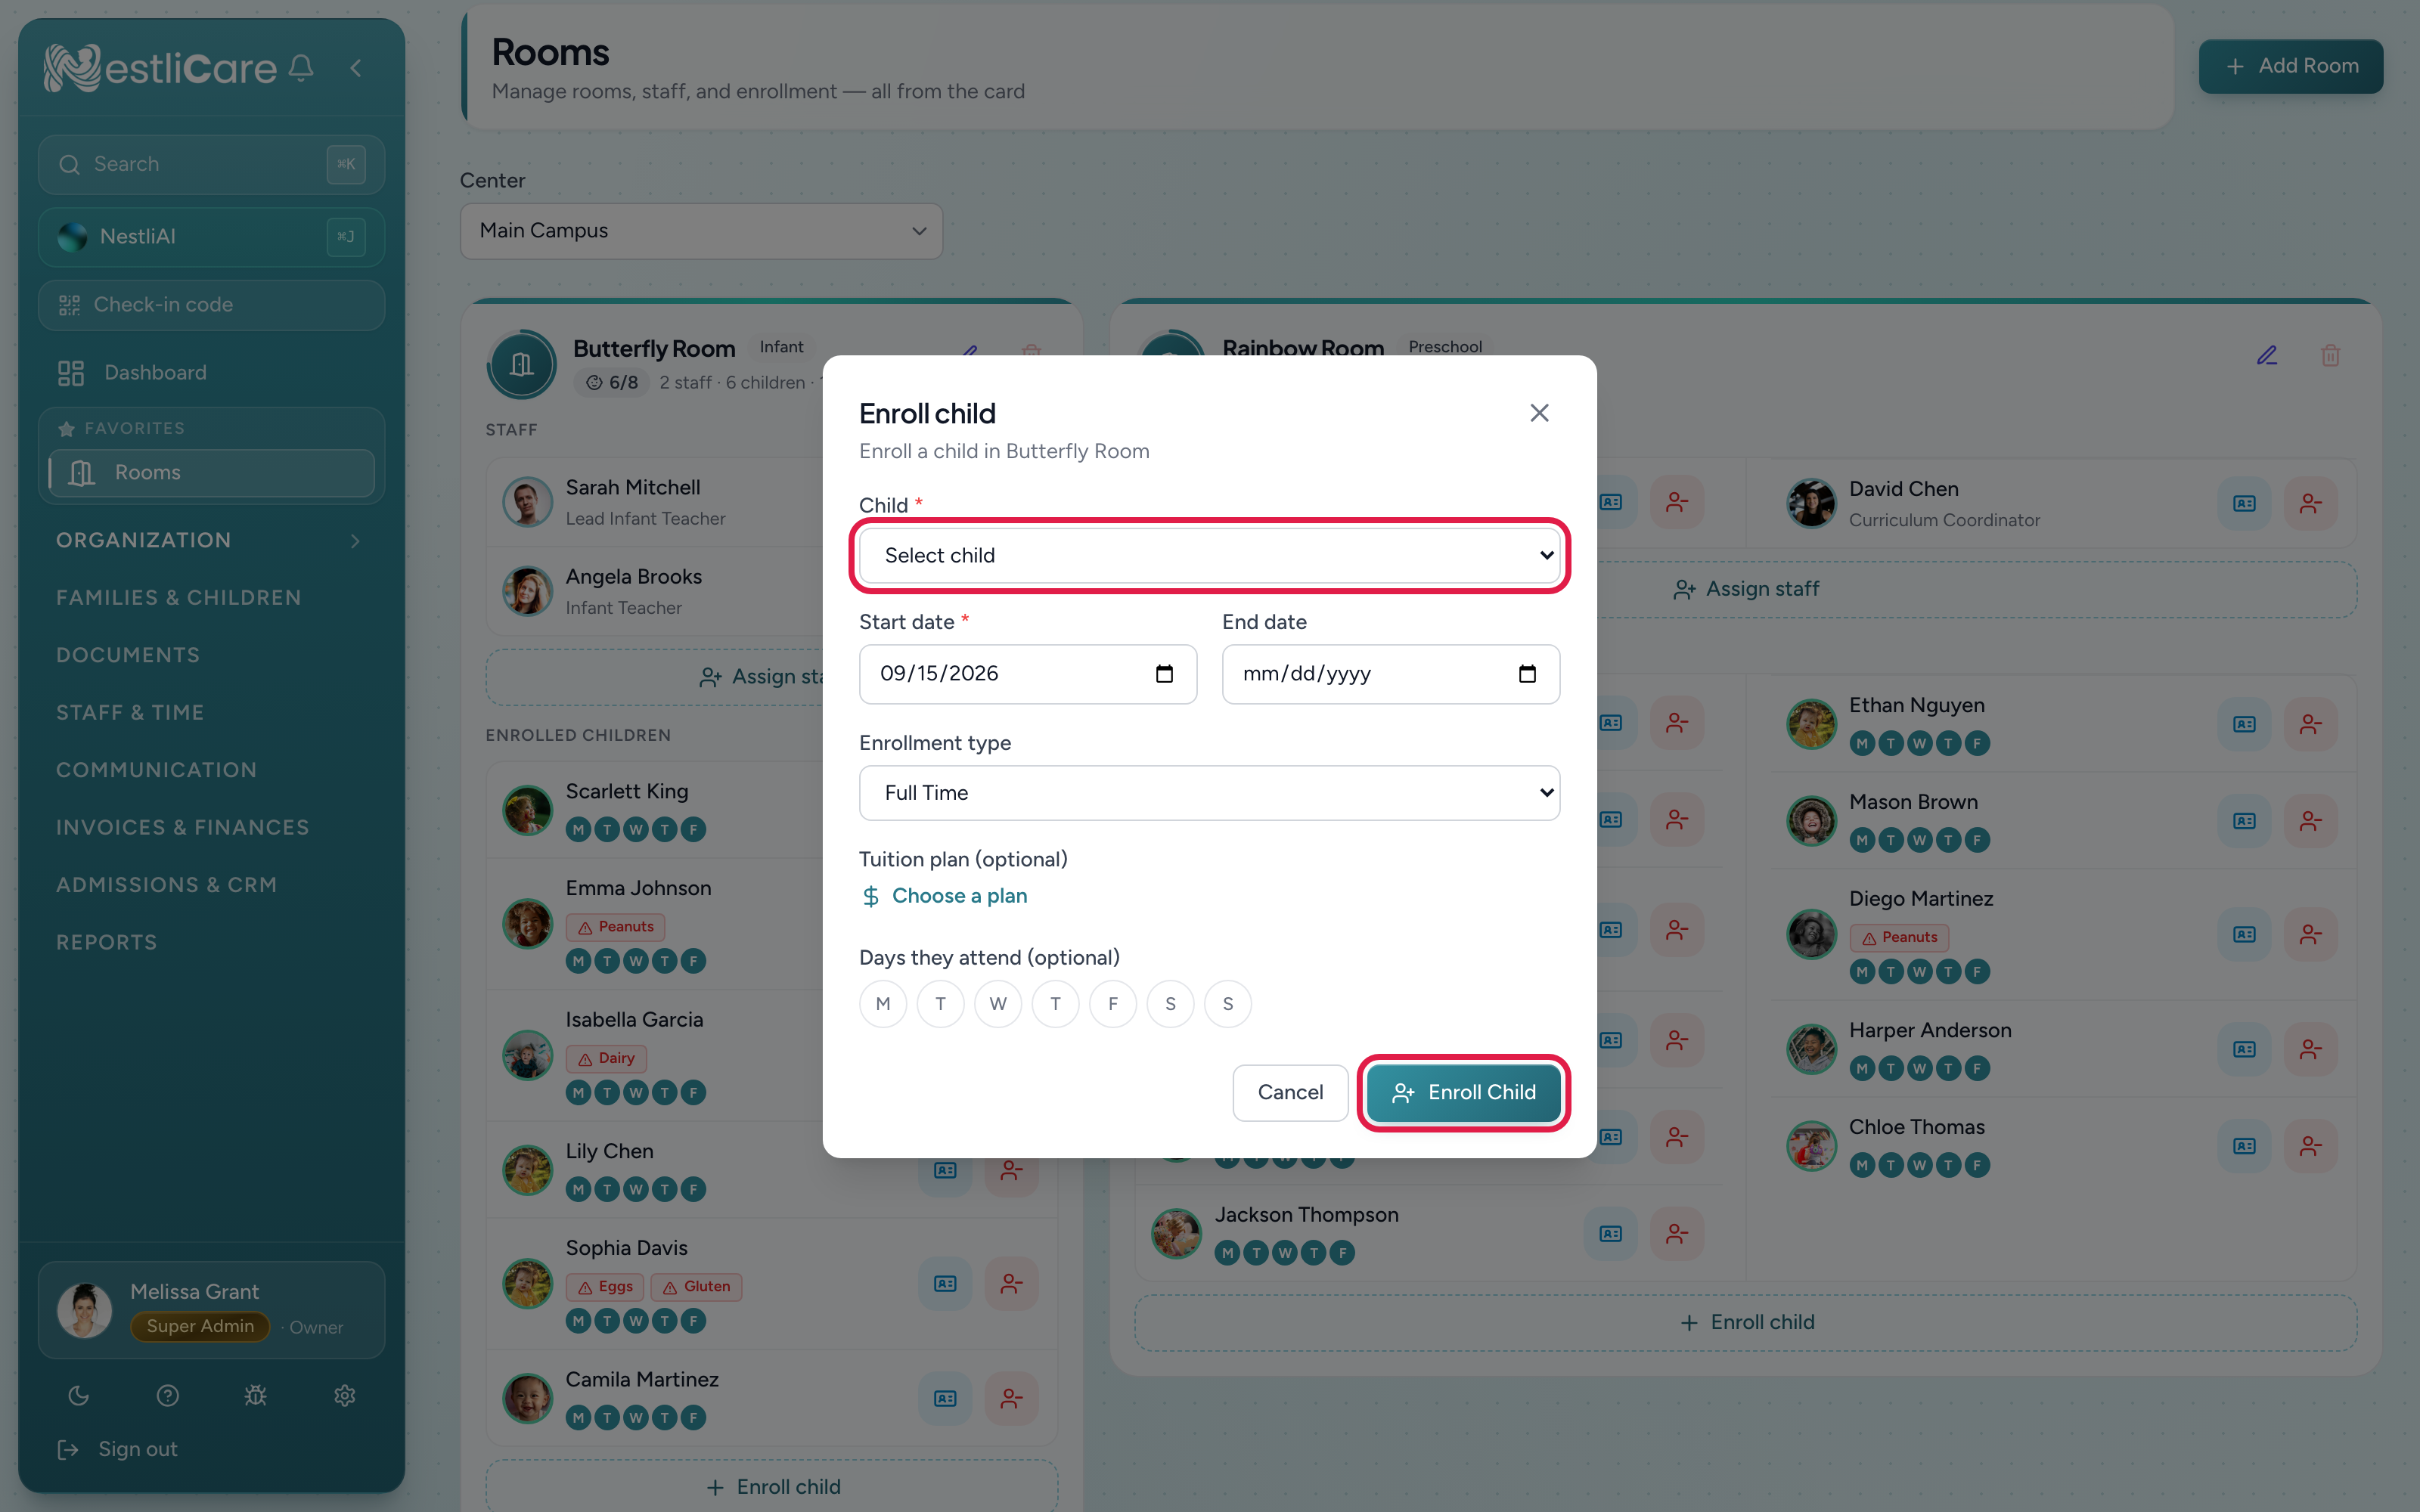
- On the destination room's card, click Enroll child at the bottom.
- In the Enroll child form:
- Child: pick them from the dropdown. A child you just removed from another room still appears here, ready to enroll.
- Start date: their first day in the new room.
- Enrollment type: Full Time, Part Time, Drop In, or Before/After.
- Tuition plan (optional): carry over the same plan, or pick a new one if the move changes the price.
- Days they attend (optional): the weekdays they'll be in.
- Click Enroll Child.
Troubleshooting
The child shows up in both rooms. Either their old enrollment wasn't removed, or they also attend the second room on purpose. For the first, go back to the old room's card and use Remove from [room name] on their row. For the second, the Also attends row on their profile shows the extra room, with an x to end it.
I don't see Remove on the row. The buttons only appear when you hover over the child's row. Move your cursor over the row and they show on the right.
The child isn't in the Enroll child dropdown. They may be at a different center. Use the center picker at the top of the Rooms page to switch centers.
I want to change dates or enrollment type, not the room. Open the child's profile (the ID-card button on the row) and, in the Enrollment section of the Details tab, click the Enrolled or Enrollment type row. The room stays as it is.