
Clock in and out from your phone
Where the Clock In button is in the mobile app, what changes when your center requires a QR scan, and how owners and admins clock themselves in.
You clock in and out from the Dashboard tab of the mobile app. There is one banner at the top of that tab, and it is the same banner for everyone on your team — teachers, center admins, and the owner.
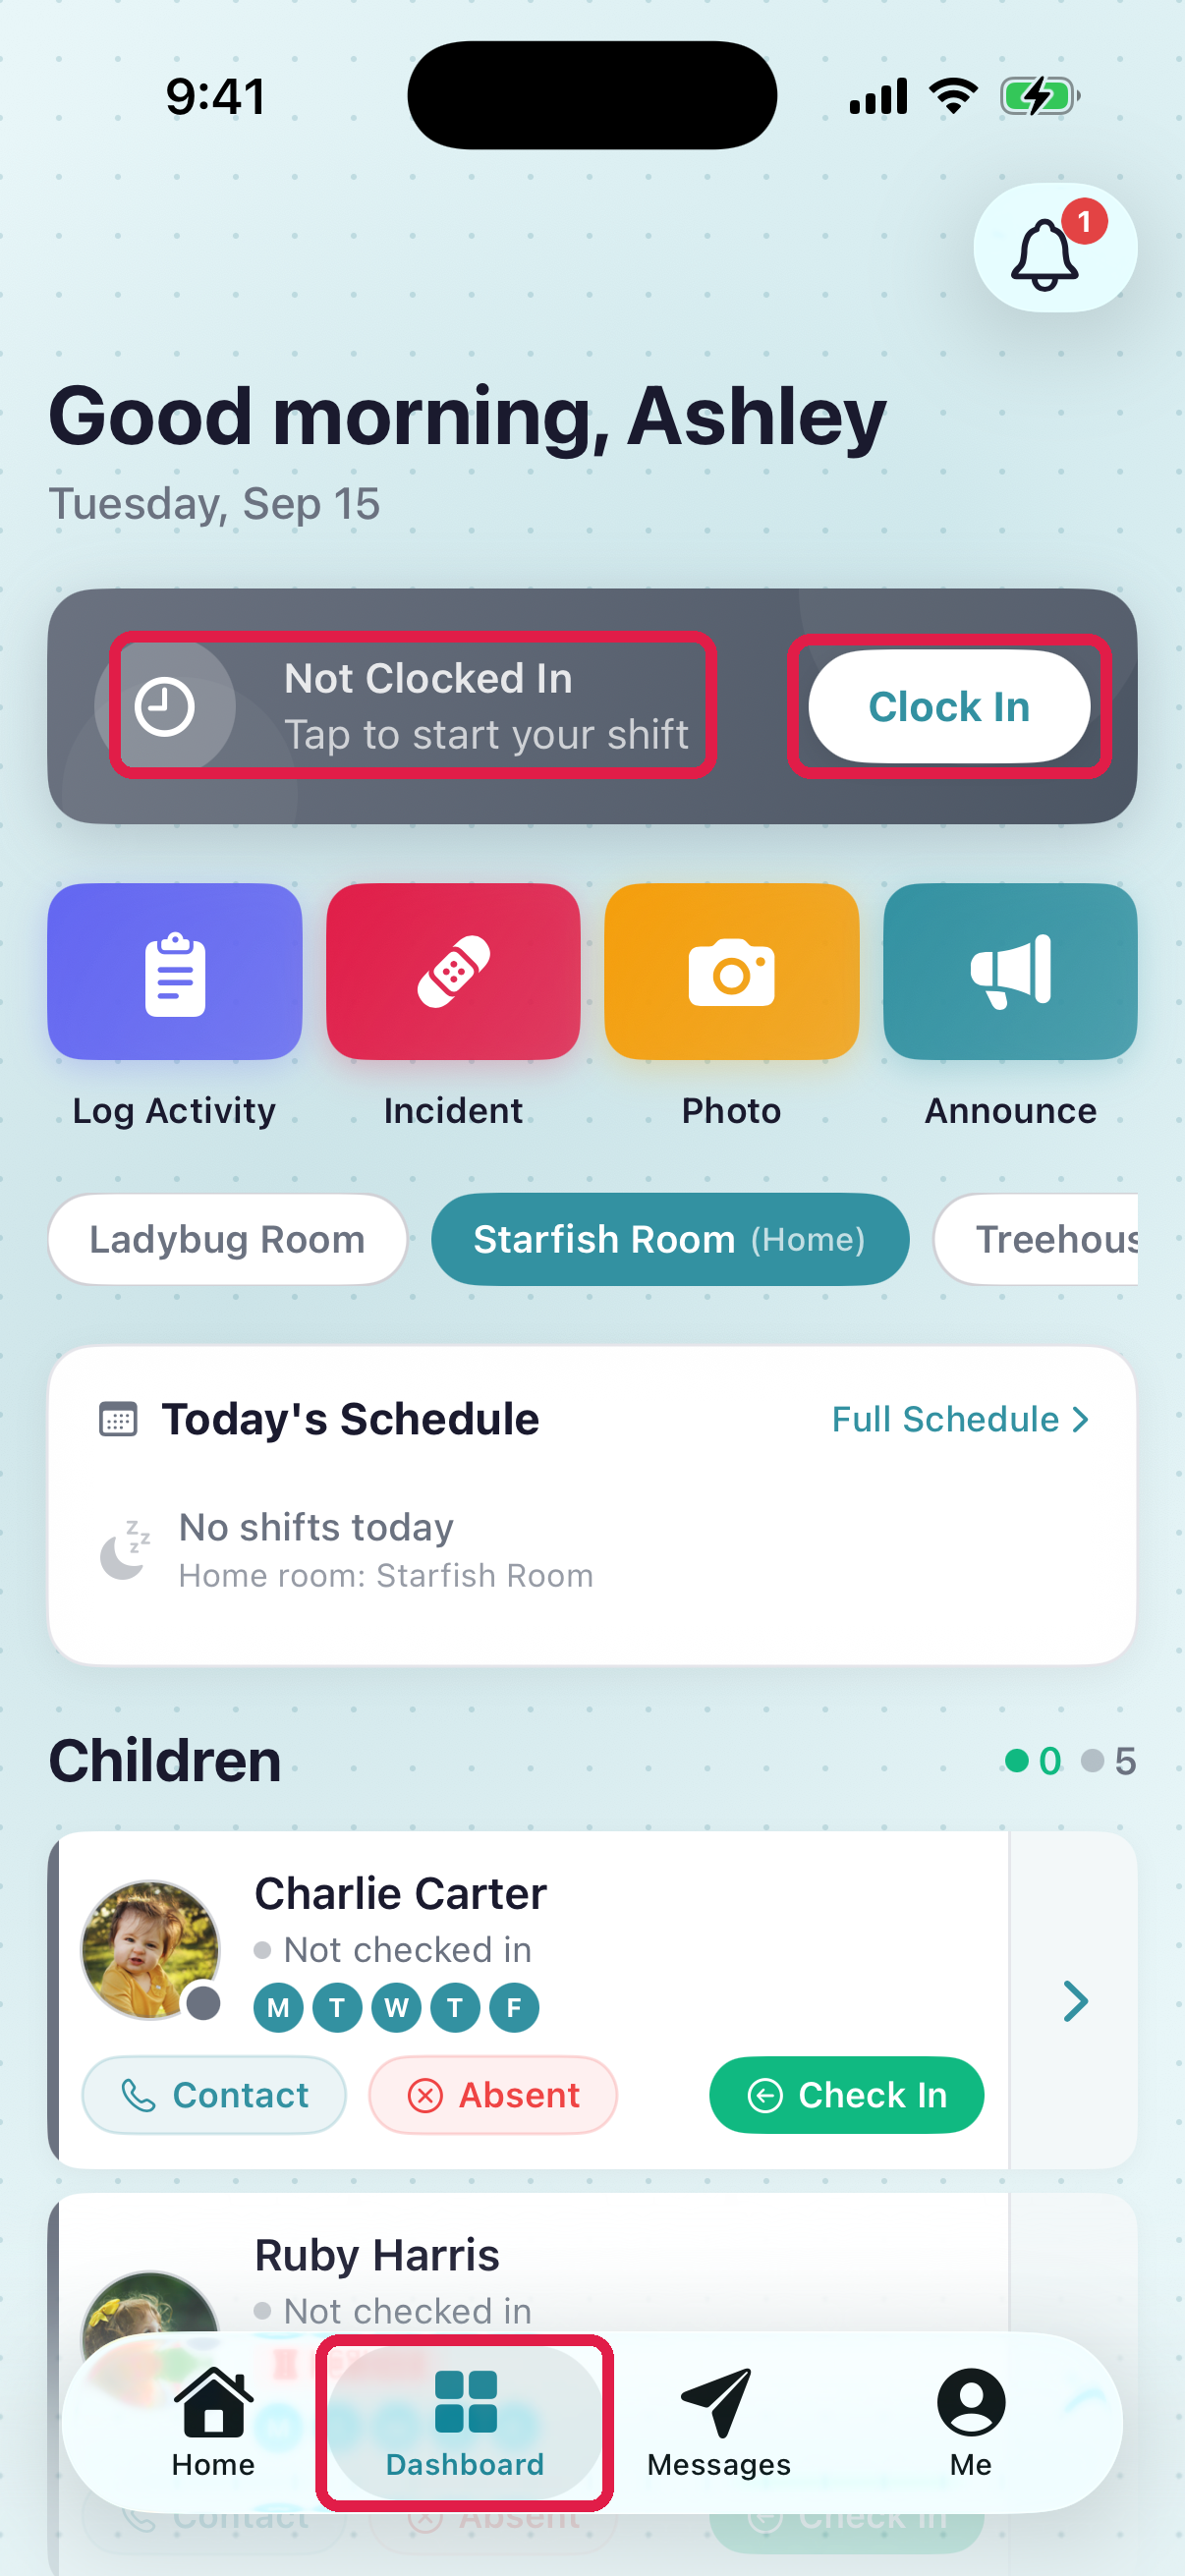
- 1Dashboard tab — the clock banner is always near the top of this tab
- 2Your current status: Not Clocked In, or Clocked In with your elapsed time
- 3Clock In — the same button reads Clock Out once your shift has started
First: does your center require a QR scan?
This is the one setting that changes the whole flow, so check it before you follow the steps below.
Where to look: on the web dashboard, go to Settings → Operations and find the Staff Time Tracking panel. The toggle is called Require center QR to clock in and out. From the mobile app an owner can find the same toggle under ADMIN → Settings, where it reads Require QR scan to clock in.
What it is set to by default depends on how old your organization is:
- Organizations created before around 20 August 2026 have it off. Nobody turned it on for you, so unless an owner has switched it on since, your team does not scan anything.
- Organizations created after that date start with it on, because their teams install the current app from day one.
When a scan is not required
- Open the app and go to the Dashboard tab.
- Tap Clock In on the banner at the top.
That is the whole flow. The banner immediately switches to Clocked In and starts counting your shift, shown as hours and minutes.
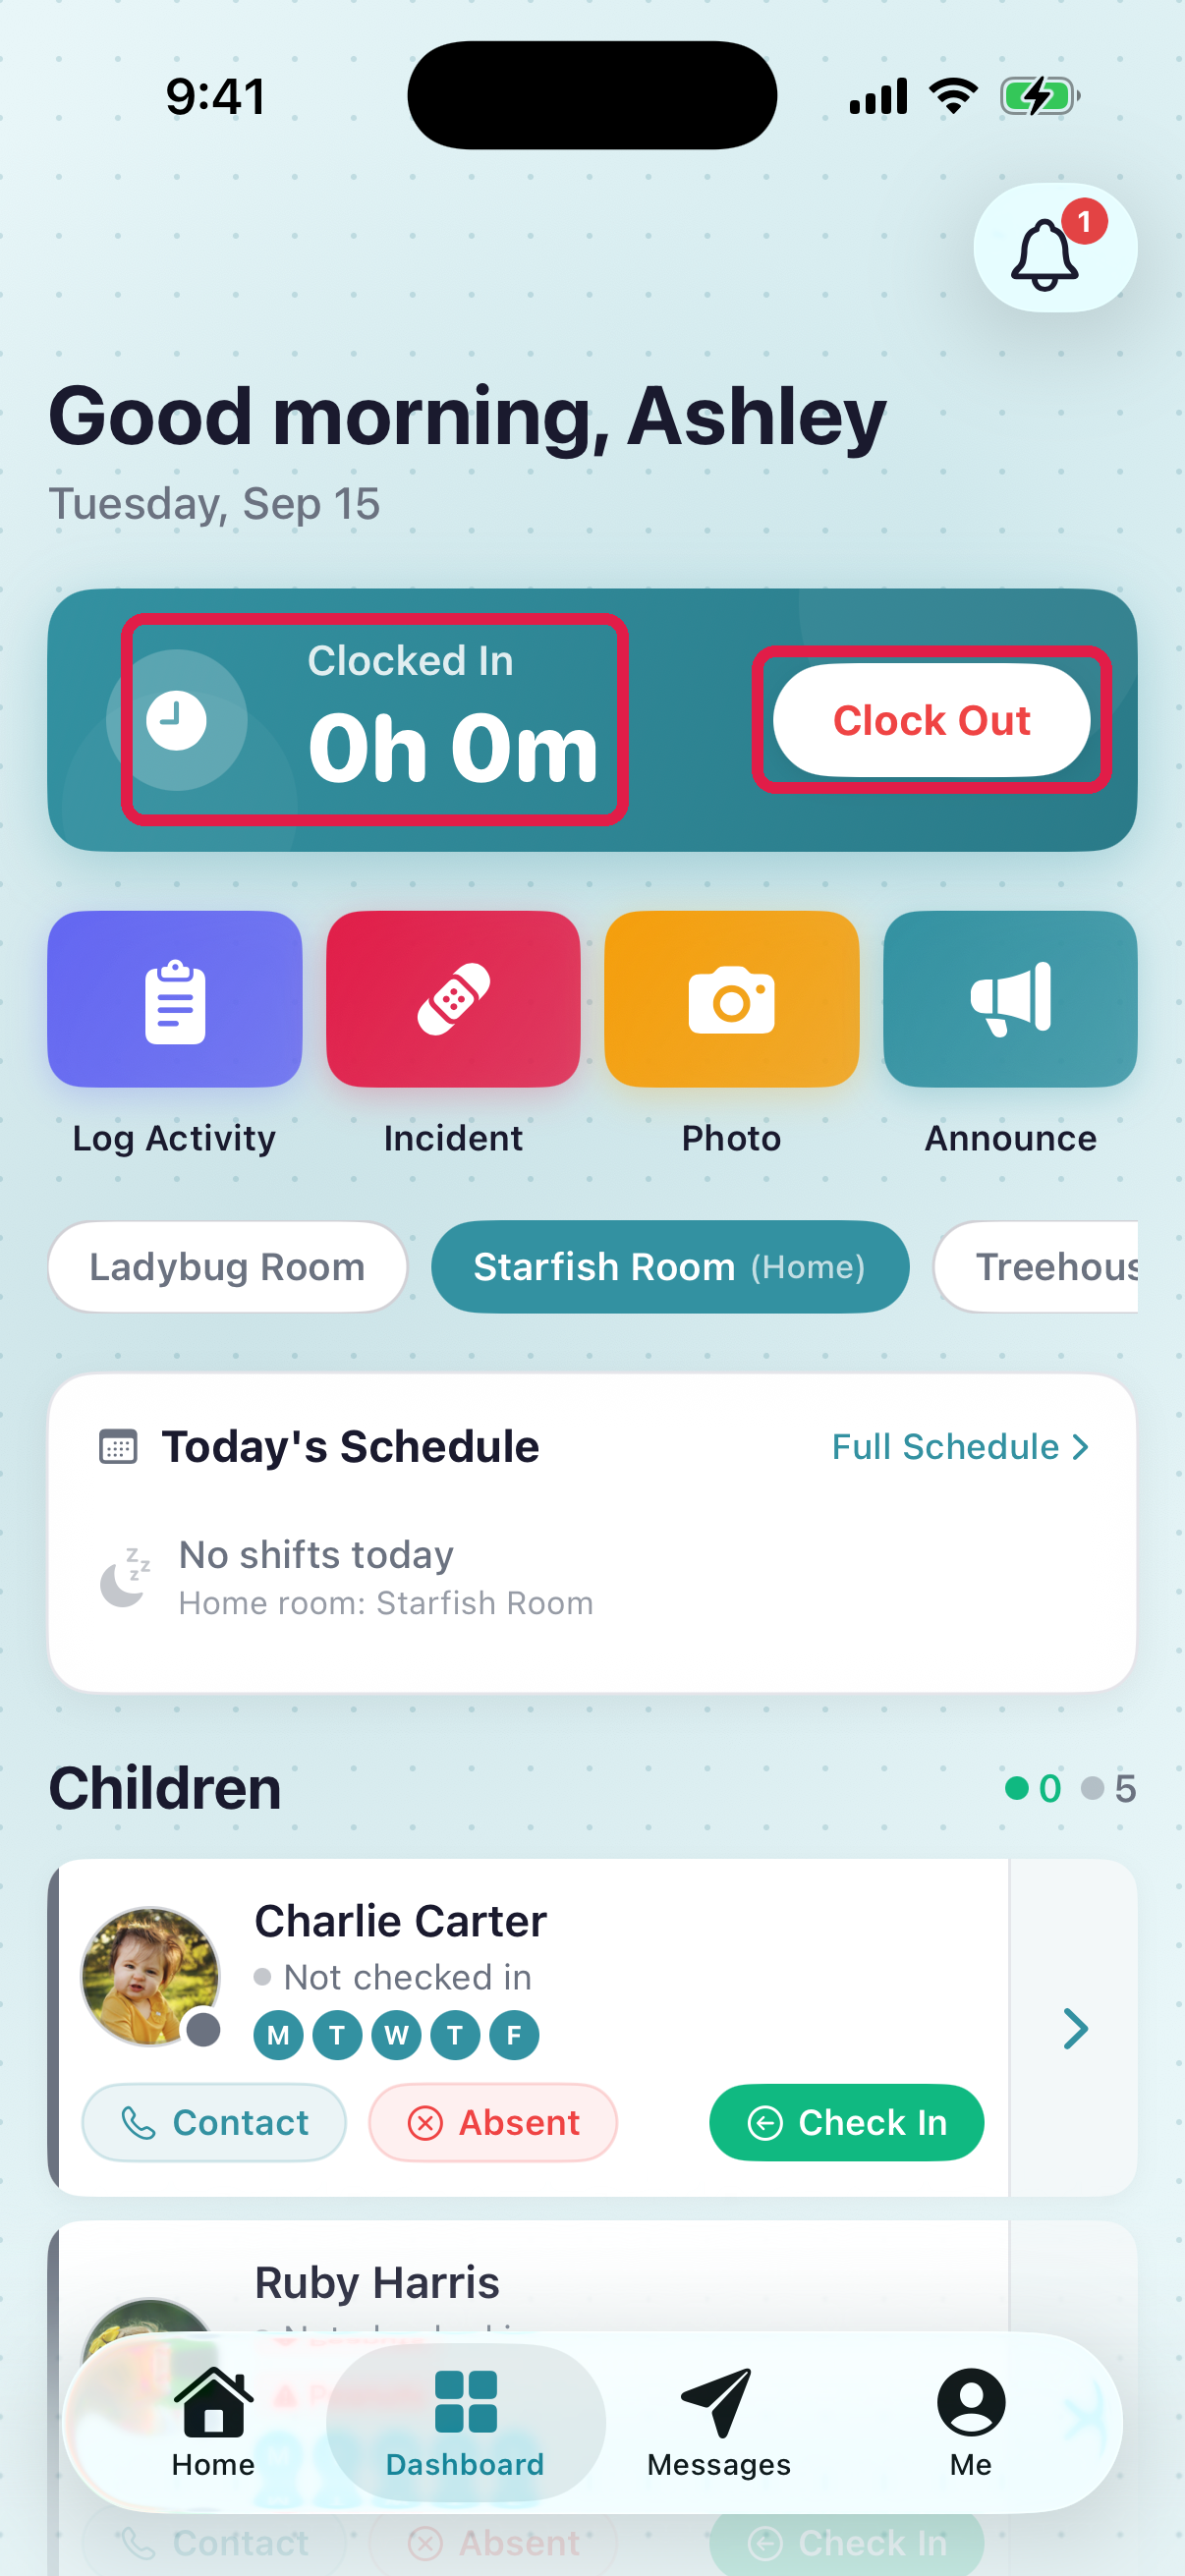
- 1Clocked In, with your shift time counting up from 0h 0m
- 2Clock Out — the same button, now in red
To finish your shift, tap Clock Out on the same banner.
When a scan is required
With the setting on, tapping Clock In does not punch you in straight away — it opens the camera instead.
- Go to the Dashboard tab and tap Clock In.
- The camera opens full screen. On iPhone the screen is titled Scan to Clock In, with the line "Point your camera at the center QR code."
- Point the camera at your center's QR code.
- The app confirms with Clocked In! and closes the camera by itself.
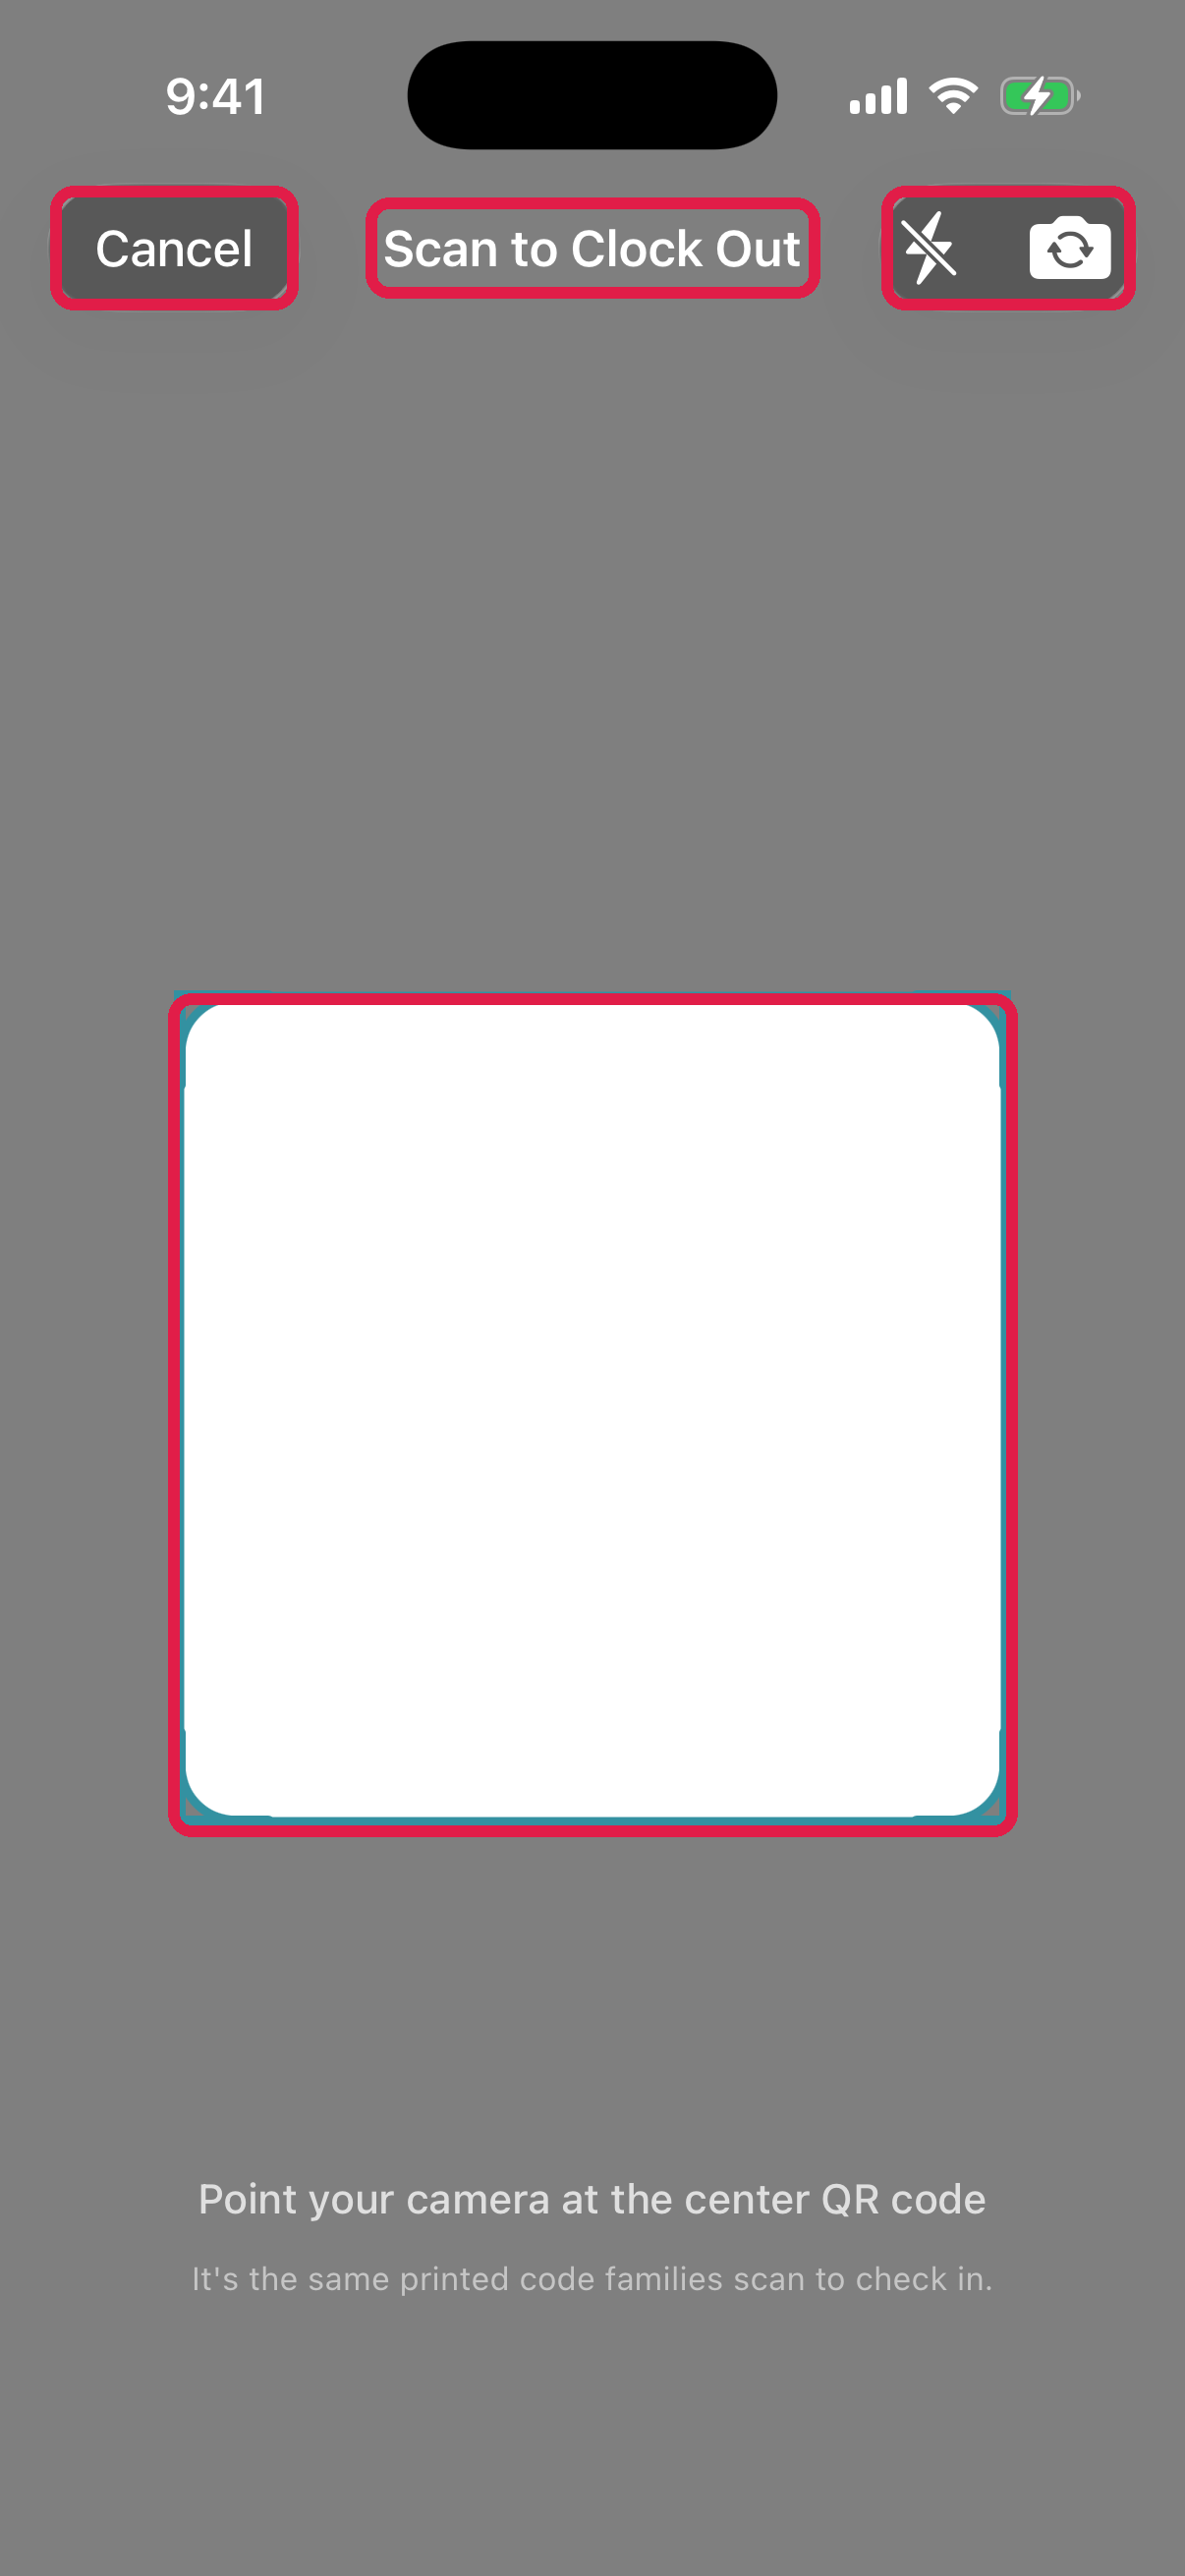
- 1Scan to Clock In — reads Scan to Clock Out when you are ending a shift
- 2Cancel — backs out without punching
- 3Torch, for a dimly lit hallway, and a front/back camera switch
- 4Line the QR code up inside the frame. It scans on its own — there is no shutter button
The first time you do this, iPhone asks for permission to use the camera. Tap Allow — without it the scanner cannot open, and you would have to grant it later in your phone's Settings.
Clocking out is identical, and the screen reads Scan to Clock Out.
The code you scan is your center's check-in QR code — the same one families scan to check their children in. There is no separate staff code. It comes from Kiosk Mode, and an owner sets it up in one of two ways:
- A printable code, which you print once and post wherever staff arrive. It does not have to be at the front desk.
- A rotating code, which only ever appears on a tablet screen and changes every five minutes. A rotating code cannot be printed, and a photo of it stops working within minutes.
The scan also decides which center the punch belongs to. If you cover more than one site, you no longer have to remember to switch centers — scan where you are, and your hours land against that center.
There is no automatic clock-in
NestliCare never punches you in for you. There is no setting that clocks you in when your shift starts, when you arrive, or when you open the app. Every punch is a deliberate tap, whether or not scanning is required.
If what you actually want is to see your shifts so that clocking in is quick, that is the schedule — see See your work schedule.
If someone could not clock in themselves
An owner or center admin can record a punch for someone else, but not from the Timesheets page as you might expect. On the web dashboard:
- Go to Staff and click the person.
- Open their Time tab.
- Pick a Center, then use Clock in or Clock out.
Teachers can only ever punch themselves. They cannot clock in a colleague, with or without the QR setting on.
A punch entered this way needs no scan. Note that it does not show any "entered by an admin" marker on the web dashboard, so if it matters to you who recorded it, add a note when you correct the entry later.
Troubleshooting
"Staff ID not found. Please log out and log back in." Your user account is not linked to a staff record, so there is nothing to attach a punch to. Logging out and back in usually will not fix this on its own — ask an owner to check that you appear on the Staff page, and to add you if you do not.
"Center not assigned. Please contact your administrator." You are not attached to a center, so the app cannot decide where the punch belongs. An owner can set this on your staff profile.
You do not see a clock banner at all. On iPhone the banner is hidden when your organization has timesheets switched off. Ask an owner whether Timesheets is enabled for your center. (On Android the banner is shown even when the feature is off, so it may appear for you and not for a colleague on an iPhone.)
The scan is refused. The most common causes are a photo of a rotating code that has since changed, a printed code that was reset after you saved it, or a code belonging to a different organization. Scan the code actually on display at your center. The camera stays open after a failed scan, so you can try again straight away without starting over.
"Already has an active clock-in." You are still clocked in from an earlier shift that was never closed. Clock out first, then clock in again, and ask an admin to correct the earlier entry.
Your app has no scanner. You are on an app version that predates QR clock-in. Update NestliCare from the App Store or Google Play.
Related: See your hours and timesheets, Require a QR scan to clock in, Set up kiosk mode.