
Create a billing plan
Set up a reusable tuition template with a name, amount, and billing interval, then attach it to a child's enrollment.
A billing plan is a reusable template for what you charge. "Toddler Full-Time, $1,200 per month" is one plan; "Before & After Care, $90 per week" is another. You create the plan once, then attach it to each child's enrollment.
Create the plan
- Go to Billing & Payments → Billing. You'll land on the Billing Plans tab.
- Click Create Plan.
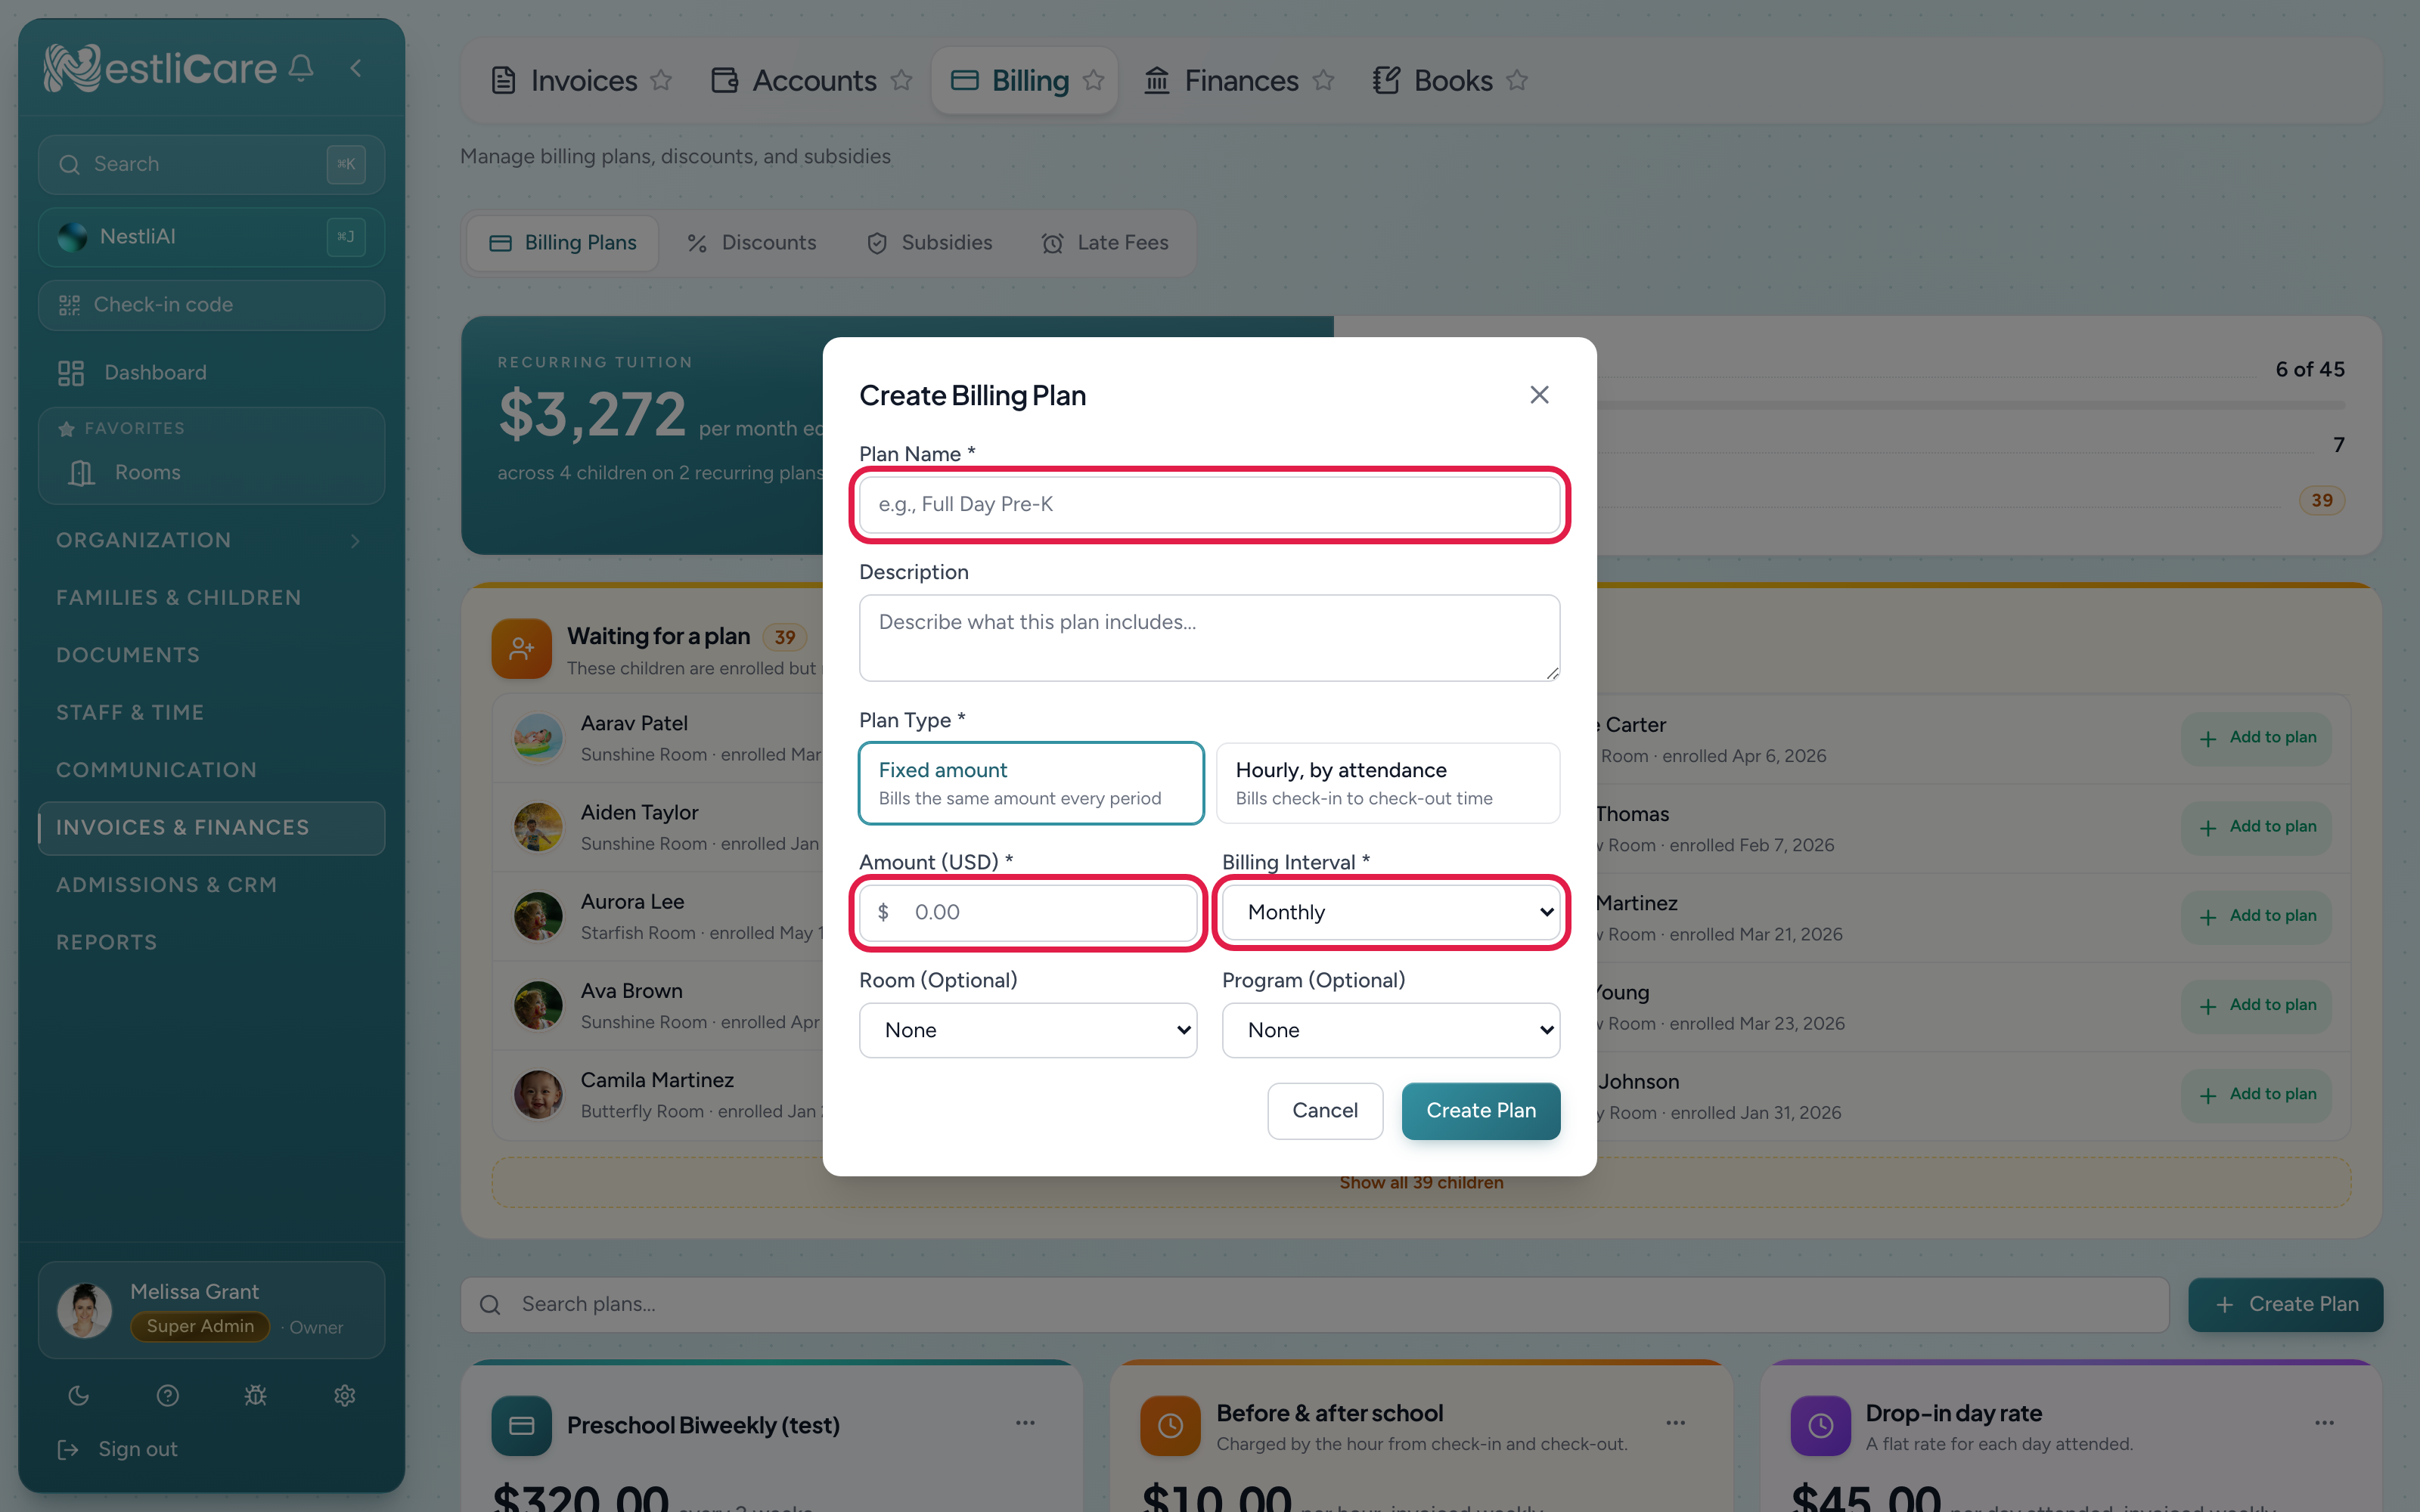
- Fill in the Create Billing Plan form:
- Plan Name (required), like
Full Day Pre-K - Description (optional)
- Plan Type (required): Fixed amount bills the same every period. Hourly, by attendance bills check-in to check-out time instead — either per hour or as a flat rate per attended day (drop-in) — see Bill by the hour from attendance.
- Amount (USD) (required)
- Billing Interval (required): Weekly, Bi-weekly, Monthly, or One-time (see below)
- Room (optional): tie the plan to one room
- Program (optional): tie the plan to one program
- Plan Name (required), like
- Click Create Plan.
The rest of this article covers Fixed amount plans, which is what most tuition is.
The plan appears as a card on the Billing Plans tab, showing its rate and how many children are enrolled on it.
One-time plans: a year or semester paid up front
Some families pay once for the whole year or term rather than weekly or monthly. Others owe a single registration fee or deposit. Set the Billing Interval to One-time for those.
A one-time plan behaves differently from the other three on purpose:
- It is never auto-generated. Automatic invoicing only runs the weekly, bi-weekly and monthly cycles, so a one-time plan is left out of it entirely. That is the point: attaching one records what the family owes and keeps them out of recurring billing, so they can't be accidentally invoiced every week on top of what they already paid.
- You raise the invoice when you're ready. Go to Invoices → Create Invoice, pick the family, and the amount is filled in from their plan. Set the period to whatever the payment covers (a school year, a term) and send it.
- It won't appear in Upcoming invoices, because nothing is scheduled to generate.
One-time plans are always Fixed amount — billing by the hour needs a period of attendance to measure, so the combination isn't offered.
Attach a plan to a child
A plan doesn't charge anyone until it's attached to a child's enrollment. You do that from the child's profile:
- Open the child's profile from Families & Children, a family card, or their row on a room card.
- On the Details tab, click the Billing plan row in the Enrollment section.
- Pick the plan.
A child who isn't in a room yet needs an enrollment first: use Enroll in a room in the same section, or Enroll child on a room card, which also asks for the plan up front.
See Move a child from one room to another for more on how enrollment works.
Edit a plan
Open a plan from the Billing Plans tab to change its name, description, or amount. Changes apply to future invoices; invoices already generated keep their original amounts.
Discounts and subsidies
Sibling discounts, scholarships, and subsidy accounts aren't part of a plan. They're set up on the Discounts and Subsidies tabs of the Billing page and are applied when invoices are generated. See Subsidies and discounts.
Troubleshooting
The plan isn't offered when I enroll a child. Plans tied to a specific room or program only suggest for children in that room or program. Leave Room and Program blank for a plan you want to use anywhere.
I need to change how often a plan bills. Open the plan from the Billing Plans tab and change its Billing Interval. It applies from the next generation; invoices already created keep their periods. To move just one family to a different cadence, give their child a different plan instead: see Switch a family to bi-weekly billing.
I need to charge for the hours a child actually attended. That's a different plan type — see Bill by the hour from attendance.